LB MODEL UPDATE #4
Now, I'm-a gonna run this model through UVLayout. Maya DOES have its own unwrapper tool, but some things got borked in the process while my sister taught me how to use that I want to run it through my old friend again. UVLayout isn't a free program, but it does have a trial version that you can freely use...as long as you go back to the site and redownload constantly. UVLayout is also entirely hot-key based, so it's not friendly for new users, but once you lean the keys, unwrapping things is a breeze.
You may ask, what is unwrapping? The best analogy for it is to think how an atlas works. Atlases are basically a flat representation of the world, something you can map out in a 2D space. In modeling, this is translating your model into a 2D plane. It's the reason you can get freaky looking textures such as this, this is technically a flattened Donkey Kong. There's even a plugin for Maya named "Roadkill" since...well your models DO look like roadkill when you flat them out.
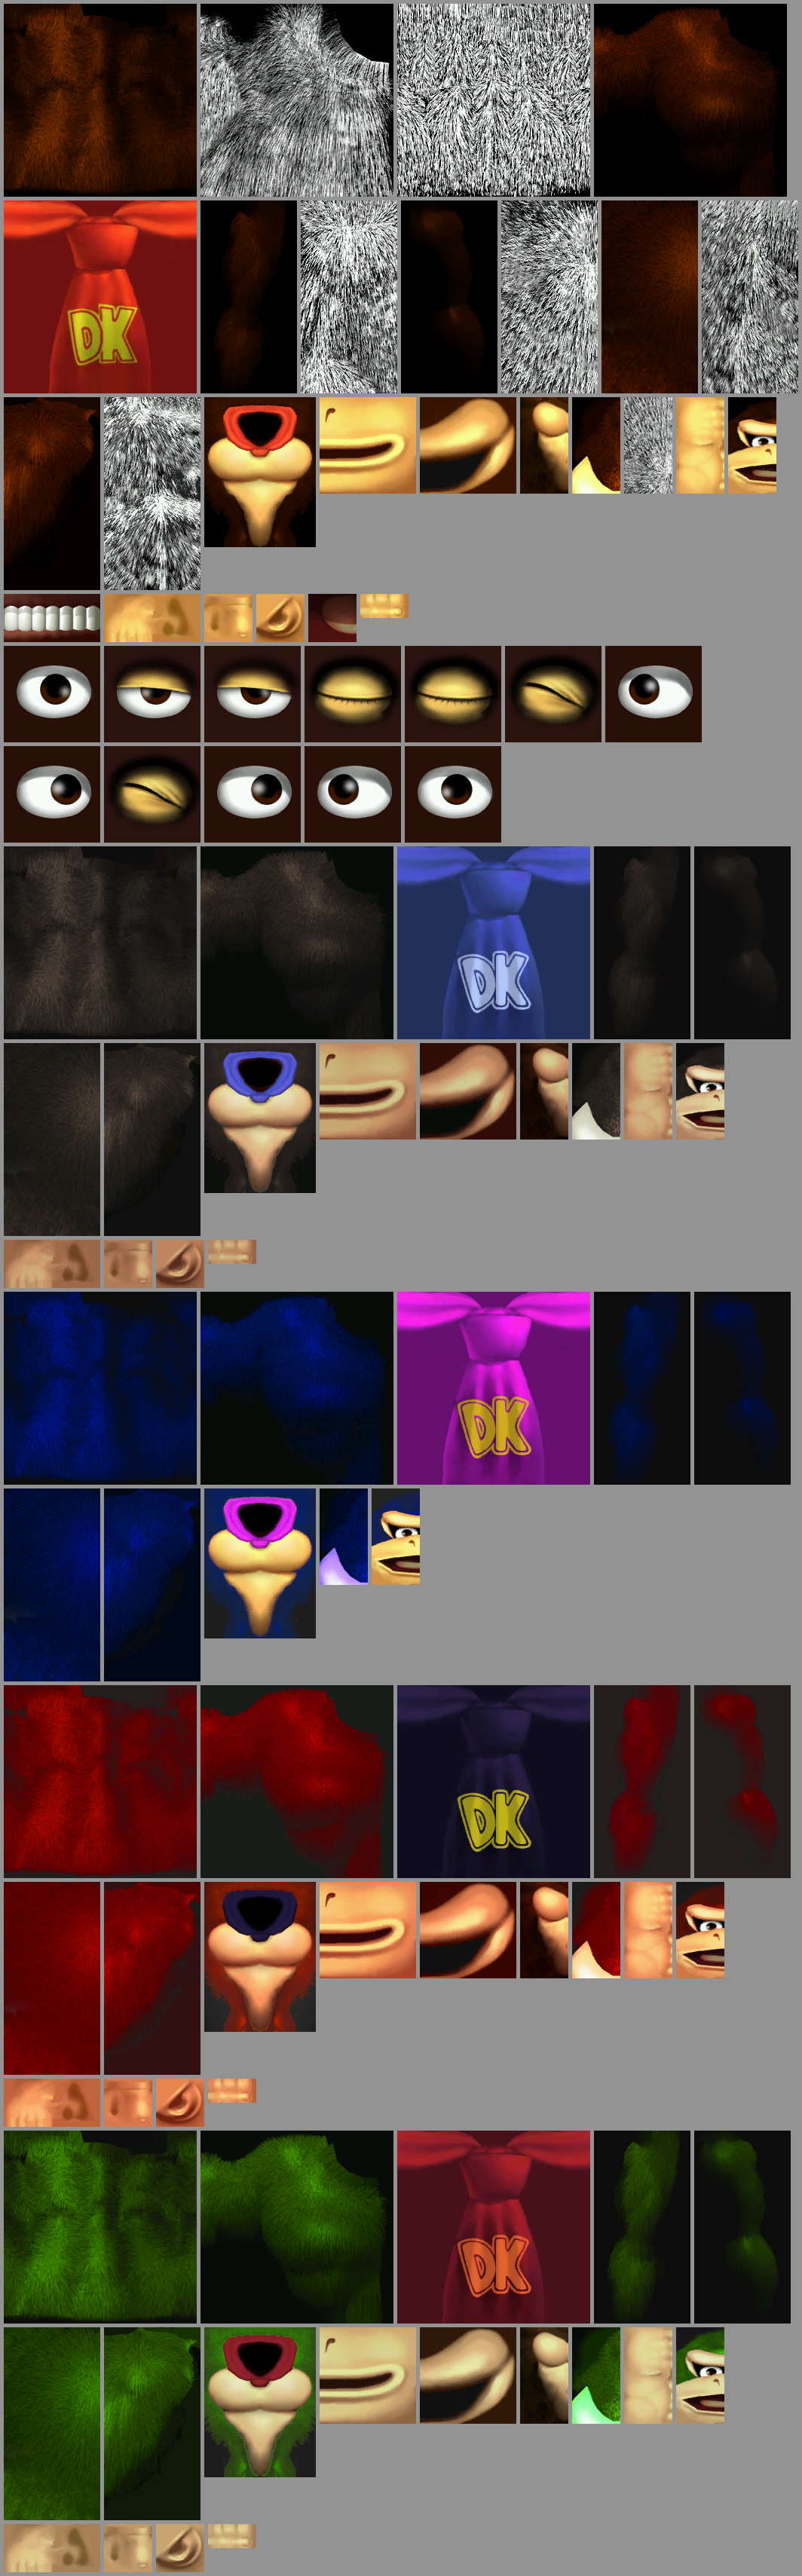
Anyway, you flatten your model out, causing the least distortions possible (either pinching or stretching), and UVLayout provides a great visual aid on how it works, and may even provide beginners clues on how to cut seams on your model so it flattens properly.
You want as less seams as possible on your model, since seams screw around with your tiling, and so typically, seams are drawn in areas you don't see them or in hard ridges. If any of you know how to sew things together, it's a bit similar to that.
I've got LB loaded.
So, you can tackle any shell you want, but the one I'd like to tackle first is the hands.
Hands away!
Don't worry, this dragging won't be reflected on the final model, so all is good.
When you cut, you have to look at how the model is pieced together. One of the best aids on where to cut is to take a look at official models and try finding their seams and follow what they do. It takes practice to fully figure out where are the best parts to cut seams but there is a general rule to look for that I've already outlined earlier in this post.
In UVLayout, clicking C on the edges cuts a seam. Double clicking C on a seam selects the entire edgeloop. W welds seams back together.
See, quads are amazing and stuff you can get only in your own created models!

I've cut some seams already.
Pressing "Enter" cuts it
I then press "D" on the cylinder object, as that's read to be flattened, and then press U, which takes me to the flattener.
I press and hold "F" on the model, and it visually flattens it!
So...that's how you use this program for the most part (there's more to it such as fixing your sewing mistakes and reverting your model to the workspace if you make a mistake). I'm not going to outline every step, but you have to do this for almost all parts of the model. As I said earlier, Maya has its own unwrapper tool so you don't have to switch between programs if you don't want to, but I highly recommend this program if you want a feel on how to cut seams and unwrap.
(After two hours of unwrapping)
Looks done but there ARE a few tweaks I need to make, specifically in the mouth region. His mouth isn't actually symmetrical, so I'm going to fix that asap. I'll import him back to Maya and group the parts together that will share same material. Texturing is the next step in Substance Painter, which I need to pay attention to what models use what material and share those together so Substance separates those.