
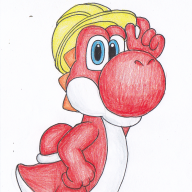
Space Splash Museum (Art Thread)

Yoshi the SSM

Dry Bowser
Pronouns
he/him
MarioWiki
Yoshi the SSM
You know, seeing other people having art threads and having some art of mine own, I, Yoshi the SSM, decided to create one myself. Here, you can see rough sketches of what was seen later. But also, I can post any pictures here that aren't related to scribble or anything else. If you want me to create something, feel free to ask.

Directory:
Page 1
Favorite Super Mario Bros. Wonder Level Presentation (2025)
Scribble Circuit Vs. Rounds
Scribble Circuit Challenge Rounds
 
Last edited:
Let's go alphabetically. First up is "Another Uncharted Area: Swaying Ruins". This is what the rough sketch looks like:
Another Uncharted Area! Swaying Ruins Base.png

And here is the final product:
Another Uncharted Area! Swaying Ruins.png

Since this is the first one that I am doing, I will need to first explain the stick figure with a question mark. It is a character that I don't know who it will be quite yet. If it has a letter, then I know who it is. As for the actual design, you see that what has changed was the Clock from Clockworks Ruins Galaxy from Super Mario Galaxy 2 didn't make it. Instead, I added the background stuff from the level. Other than that, you can actually see the design in the final which I just make words in the sketch. And I often use references when doing these. Here are the references used for the level.
Another Uncharted Area! Swaying Ruins R1.JPGAnother Uncharted Area! Swaying Ruins R2.JPGAnother Uncharted Area! Swaying Ruins R3.JPG
I am including all images that I used even if they end up going unused. Also, if you want to see the reference to the characters that signed up, see this link.
 
Last edited:
Up next is "Bulrush Coming Through" Here is the sketch:
Bulrush Coming Through Base.png

And here is what the final image:
Bulrush Coming Through.png

As you can see, this was planned to have a full 3D effect from the start. And you can see that I added the clouds, the sun, and the flagpole since the sketch. You can also see that I also didn't go for the hands on the head for the ? character in the end. Now for the references:
Bulrush Coming Through R1.JPGBulrush Coming Through R2.JPGBulrush Coming Through R3.JPGBulrush Coming Through R4.JPG
 
Now for "Color-Switch Dungeon". Here is the sketch:
Color-Switch Dungeon Base.png

And here is the final image:
Color-Switch Dungeon.png

As you can see, in the early stages, there was a mirror. However, the direction the mirror was more diagonal. The reason was to make it easier to tell that it was indeed mirrored. However, I kept the notes the same. Also, since I got two different references for the character, I decided on doing both. Though with one being another color from what the color I saw on the reference. One thing that you might see is that the red thing with lines didn't get transfer. That is because I simply forgot to change the color. Anyways. Now for the references:
Color-Switch Dungeon R1.JPGColor-Switch Dungeon R2.JPGColor-Switch Dungeon R3.JPGColor-Switch Dungeon R4.JPGColor-Switch Dungeon R5.JPGColor-Switch Dungeon R6.JPGColor-Switch Dungeon R8.JPGColor-Switch Dungeon R9.JPG
 
Now onto "High-Voltage Gauntlet". This one is different, as it has two bases. First the unused base image:
High-Voltage Gauntlet Base.png

As you can see, this was based around the level itself. However, something I noticed about the level is that it was dark. That is why I ended up going with this other base image:
High-Voltage Gauntlet Galaxy 2 Base.png

And here is the final image for comparison:
High-Voltage Gauntlet.png

Key differences are the added Mechakoopa, the added barrier seen in Bowser's Gravity Gauntlet, the added movement lines, and the character being on the other platform. Now for the references:
High-Voltage Gauntlet Galaxy 2 R.pngHigh-Voltage Gauntlet R1.JPGHigh-Voltage Gauntlet R2.JPGHigh-Voltage_Gauntlet Level R.jpg
As you can see, the reason for the yellow outline was because of these references having what I perceive as a yellow light behind the character.
 
Next is "Hot-Hot Hot!" Here is the base:
Hot-Hot Hot! Base.png


And here is the final image:
Hot-Hot Hot!.png

So, yeah. I chose I different part of the level than what my base was. I decided to use the place near the wonder effect place as I thought it was a better place. And it provided an idea for the background. I mean, take a look at the references:
Hot-Hot Hot! R1.JPGHot-Hot Hot! R2.JPGHot-Hot Hot! R3.JPGHot-Hot Hot! R4.JPGHot-Hot Hot! R5.JPGHot-Hot Hot! R6.JPG
You can see that the image I used for the main drawing has twisting scales which makes an interesting background. But other than that, the character fanning themselves is still consistent. Finally, I need to reference the character I used. This was made by BBQ Turtle:
Hot-Hot Hot! Yoshi the SSM R.png
I decided on using the construction hat for fanning as it was a much bigger object than a hand and thus made more sense to use.
 
For "Light Switch Mansion", it has an interesting base:
Light Switch Mansion Base.png

This is the only one where the base uses black first and white as the outline of the image. All others are white first and black as the outline. Here is the final image:
Light Switch Mansion.png

The differences are stairstep floor instead of flat, the doors of the level being on a chandelier instead of the floor, and light coming from the light sources instead of the window. Now for the references:
Light Switch Mansion R1.JPGLight Switch Mansion R2.JPGLight Switch Mansion R3.JPGLight Switch Mansion R4.JPGLight Switch Mansion R5.JPG
 
I decided to do two since there aren't that many images each. First, "Maw-Maw Mouthful". Here is the base:
Maw-Maw Mouthful Base.png


And here is the final image:
Maw-Maw Mouthful.png

You might notice that the ? character became a Goomba and the ? character was moved to the top right. And since it is a Boo, it makes you wonder whether if this is like an origin story, or just the Boo becoming a Goomba for a time. Other than that, you will notice a lot more details in the background. Now for the references:

Maw-Maw Mouthful R1.JPGMaw-Maw Mouthful R2.JPGMaw-Maw Mouthful R3.JPG
And that is Maw-Maw Mouthful complete. Now for "Muncher Fields". Here is the base:
Muncher Fields Base.png

And here is the final image:
Muncher Fields.png

As you can see, it is 2D rather than 3D in the base. And that is because I felt the 2D felt better to work with. There are also a Melon Piranha and a Muncher here amongst the Munchers. And the Bowser is very prominent in this level, so that is why it is there. That thing in the top left is a pipe that I added to give another background detail. Now for the references. Note that the Semi-Solids have the color of without the wonder effect because I didn't think the silhouette design would be gone for making the art:
Muncher Fields R1.JPGMuncher Fields R2.JPGMuncher Fields R3.JPGMuncher Fields R4.JPG